Sunday, January 31, 2016
Advice for Creating Great Formal Portraits
Sunday, July 28, 2013
Shoot It Till Its Dead
Thursday, January 31, 2013
Keep Your Camera Handy, Andy
Wednesday, November 7, 2012
Oh, Good it is Cloudy Today.
Wednesday, September 5, 2012
Capture the Golden Light of Sunset and Sunrise


The average person does not pay much attention to light, but photographers develop a sensitivity to the quality of light. For outdoor photography the "magic hour" is hour hour before sunset and one hour after sunrise. The sun at that time of day is not directly overhead and so it creates long shadows. The light is also not as bright and has a slight yellow cast.
Sunday, July 29, 2012
RTFM Where is My Owner’s Manual?
HERE IS A LINK TO A SHORT VIDEO ABOUT F-STOPS:
http://youtu.be/FBJLg77daP8
Tuesday, June 19, 2012
F-stops, Apertures and Lenses: a Lesson with Jon Wason
Follow this link for a 9 minute video:
http://youtu.be/FBJLg77daP8
Saturday, April 14, 2012
Celebrities Are People, too
Sunday, February 19, 2012
Why Would I Need Filters On My Lens?
by Jon Wason copyright 2012
There are several reasons to use a filter. Serious film shooters usually have a several filters in their camera bag. But with the widespread transition to digital cameras, the use of filters has waned because the after capture processing done in a computer may often accomplish the same results. A dropdown menu in Adobe Photoshop can perform wonders with an image.
However, there is one important thing that a circular piece of glass can do for you: protect your expensive lens from windblown dust, splashed liquids and blunt force impact with the floor. Replacing a cracked, dented or shattered UV filter is a lot cheaper than buying a new lens. A skylight filter is basically a clear glass but it protects your investment. A UV filter is a bit more than just glass; it filters some of the ultra violet rays and can slightly enhance the colors of your images.
The use of either a skylight filter or a UV filter is a wise choice and after taking the baby step you may want to delve deeper into the wonderful world of filters by adding a polarizer filter to your line up of equipment. A polarizer is sort of like sunglasses for your camera but better. This filter has the effect sifting multidirectional light beams into a tidy collection of light that is uniform. This is great for capturing bold blue skies. Another use is eliminating reflections, especially on surface water or glass such as the windshield of a car. The most useful polarizer filter can be rotated into the best position once mounted on the lens. These are called circular polarizer filters. If you want a dramatic sky in your photo, point the camera at about a 45 to 90 degree angle from the sun. Then slightly rotate the polarizer until you get the effect that suits you best. Linear polarizers are a bit lower in cost but cannot do this. One little parlor trick you can perform with two polarizer filters is to stack one in front of the other and rotate it. At a certain point the two polarizers cancel each other out and block all the light. Impressive.
Neutral density filters are used by digital photographers and film photographers. This is a filter that reduces the amount of light that enters the camera. This is desirable when a long exposure is required such as a photo of a mountain stream with blurred out details denoting fast moving water.
There are a variety of special effects filters. One is a star filter that creates a pleasing twinkle when photographing the flame of a candle or sunlight reflecting off a lake. The soft focus filter is a favorite of portrait photographers. It can create a dreamlike effect or reduce the detail of a wrinkled face.
Soft focus
Photographers who shoot black and white film can use color filters to control which parts of the light spectrum enter the camera and expose the film. For instance a red filter can bring out the green tones in an image.
Filters are yet another creative tool for photographers.
Wednesday, August 17, 2011
Tips for Photographing Children
Photographing children can be a challenge but a few simple tips can help you capture some great shots. Children can be hard to photograph because they move quickly. Children also tend to have a short attention span and their mood can change from giggling to crying in two seconds.
The first thing that I recommend when photographing children is to move down to their level because if an adult six feet-tall stands close to a four year-old and shoots a photo of that child most likely the resulting image will be the top of the child’s head. Not a great portrait.
So kneel or sit down and your photographs of children will improve. If you are getting older and your knees can’t take much kneeling; then pull up a chair. You will find yourself closer to eye level with you subjects. Also try moving closer. Some people are always too far from their subject and their images include too much background.
Because little kids run around a lot the photographer has to be ready. Using a flash can stop some of the action. Sports photographers know this. The duration of typical photo strobe is 1/10,000 of a second. Even a sugared up three-year-old does not cover much territory in that short amount of time. Even on a sunny day a flash can improve your photography because mid-day sun tends to created harsh shadows under the eyes, nose and chin. The light of a flash can reduce this problem.
If you are attempting to shoot a formal or semi-formal portrait of a child in a studio setting get the camera and all the equipment set up before the child (or children) are asked to pose. Otherwise the ten minutes or so that they can refrain from running, jumping and playing are wasted as you set the ISO, changes lens and adjust the shutter speed. By the time you are ready to start, they are all done and twitching to get out there and play.
What happens if the happy children are uncooperative, bored or crying? I usually try to enlist the help of the parents to get the child to cooperate. But I do not push it too far. I believe that children (and all people) have a limit of how long they can pose for the camera. Even professional models have limits.
Threatening a child to smile or face punishment is not effective but I have witnesses several occasions when a well-meaning parent said something like, “smile or I’ll take away your Gameboy.” It doesn’t bring a smile to the children’s face.
The candid approach is very effective for children. Just let kids be kids and photograph them from a distance. Shoot a lot and delete the ones that did not work out. Also keep practicing. The more you practice the better you will get at photographing children.

Monday, June 6, 2011
A Drive in the Countryside
As I passed Sherwood Farm in Easton, CT I saw this little old tractor out in the field. It only took a moment to capture a great shot. This farm has been tilled by the Sherwood family for nearly 300 years. They offer all sorts of fresh vegetables and honey.
Monday, April 18, 2011
These are Some of My Recent Black and White Images
Thursday, April 14, 2011
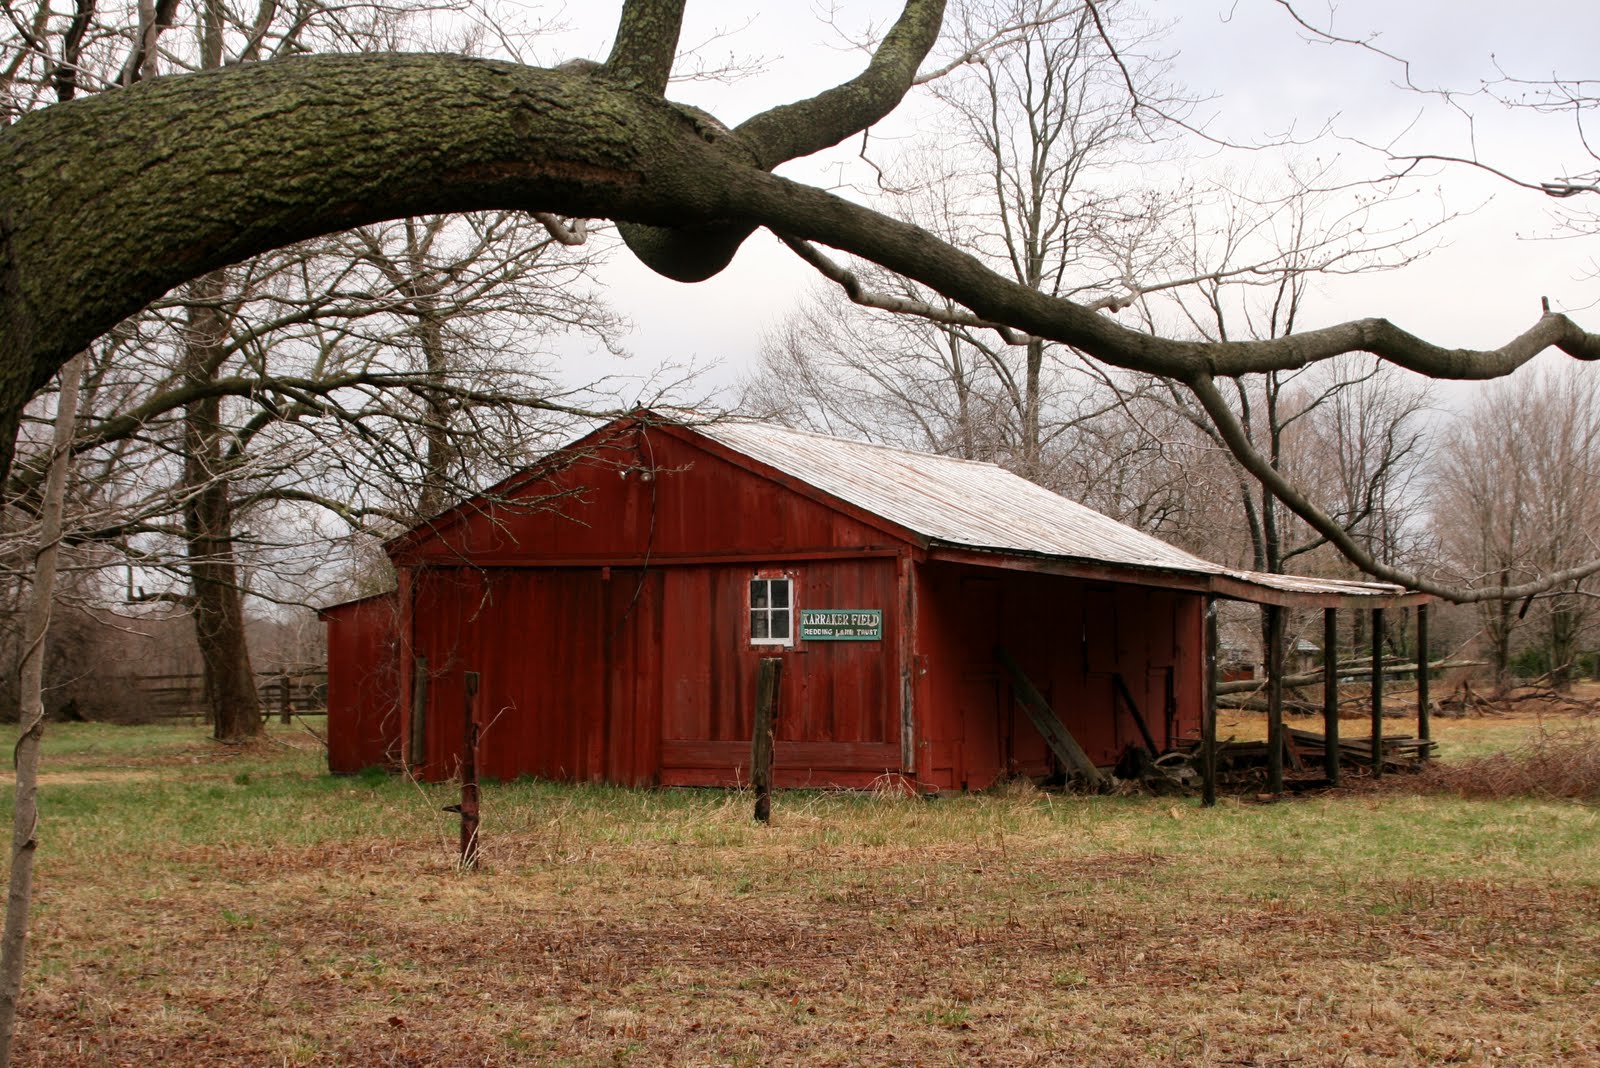
An Old Shed Near Redding Connecticut
Thursday, March 3, 2011
Adventure in the North with Death Valley Danny
While prospecting for Gold up in the Yukon Territory with a man named Death Valley Danny it got so cold that we almost froze to death. But my trusty sled dog named Woofer contributed to my survival. Danny was not used to this Northern climate since he was from the high desert in California. He only came north to get a change of scenery for a while and to collect a gambling debt. I met Danny about a year ago when I was passing through Death Valley on my way from Texas to Hollywood. I was on my way to audition for a part in the talking movie called the Zigfield Follies of 1939 when my Stutz Bearcat automobile broke down near Scotty’s Castle. I caught a ride with a truck driver hauling a load of Crosley radios. While waiting for the car to be repaired I was biding my time in the lobby of the Oasis Hotel. I joined a poker game with a man in a yellow zoot suit, two cowboys and an old man wearing a bathrobe. One of the cowboys was abruptly asked to leave the table. Cheater, I guess.
Tuesday, June 29, 2010
Flash Memory is a Marvel of Modern Science
The person credited with inventing flash memory is Dr. Fujio Masuoka. In 1984 while working at Toshiba he made major developments in his work with cells that hold data and can be erased rapidly then rewritten. Flash was suggested as an appropriate name for the new type of memory because the process of erasing data from the cells was like a camera’s flash. History was made in 1984, when he presented this new technology at the meeting of the Institute of Electrical and Electronics Engineers (IEEE) in San Jose, CA.
Intel and other companes saw that flash memory had great potential. In 1988 Dr. Eli Harari and Sanjay Mehrotra, former coworkers at Intel, formed a company to produce flash memory for consumers. They founded SanDisk, which is now a world leader in digital memory devices. Sandisk’s launch in Silican Valley was perfectly positioned to take advantage of the the arrival of digital photography.
Some early digital cameras like the Sony Mavica stored images on a floppy disk. People liked this because it was easy to take the floppy out of the camera and insert it into a computer to transfer the images. The next generation of Mavica recorded images to a CD. But flash cards ultimately became the prefered media for digital cameras because they were small, had no moving parts and could be erased again and again.
As competition heated up, each brand would advertise higher capacity cards: Attention we have 4 Gigabyte cards! Look 8 GB for sale! Introducing 16 GB! Come and get the amazing 32 GB card! 64 GB cards are here! And as the public purchased the newest memory cards they found that the price paid per GB dropped steadily. That is the good news, but there is also bad news.
Unfortunately, counterfeit CF cards that look authentic but are knockoffs of the big name flash memory cards have appeared. These are passed off as the real thing to bargain hunters who later may find their joy of getting a great deal replaced by the sinking feeling that accompanies the realization that their data is lost.
Overall the invention of flash memory has been a great benefit to photography. So next time you are clicking photos take a moment to appreciate the wonders of modern technology.
Friday, June 18, 2010
What is a DSLR Anyway?
The term SLR goes back about 60 years or so to the time when 35 millimeter cameras were gaining popularity. The Single Lens Reflex (aka SLR) was a significant advancement in cameras because it improved on the design of the earliest 35 mm cameras which used a rangefinder method of focusing. That was a very simple focusing system based on the range or distance of the subject to the camera. If the person you wanted to photograph was ten feet away you set the focus lever or dial to ten feet. If they were 30 feet away you set it for 30 feet. This involved a lot of guessing. Also, the viewfinder did not allow the user to look through the lens. Instead, a rather simple viewfinder gave an approximate view. As the focus was set, nothing in the viewfinder changed. Not very helpful is it?
When some engineers came up with a focusing system using a series of mirrors, so that the photographer could see through the lens that takes the photo. This new through-the-lens viewing configuration was dubbed SLR. Photographers liked the SLR cameras because the the accurate preview including the focus of the image. Another feature was that SLR cameras were made for interchangeable lenses. A busy photojournalist could carry a variety of wide angle and telephoto lenses and quickly switch lenses to suit the situation.
Another type of camera from the old days is the Twin Lens Reflex (TLR) such as the Rolleiflex, Yashikamat and Mamiya. These cameras had two lenses - one for taking the photo and one for the viewfinder. The SLR eliminated one lens which meant cameras could be smaller.
When digital photography arrived on the scene the quest for a digital version of the SLR began. Back in the early 1990s Kodak and Nikon collaborated to create the first commercially available digital SLR, the Kodak DCS-100. It was built on the platform of a Nikon F-3 body with the film drive removed. The result was a big heavy 1.3 Megapixel camera that sold for $30,000. But it was a DSLR.
One company tried for years to make a conversion kit that transformed a 35 mm SLR into a digital camera. But this never made it to the marketplace. In the end it was easier to design and build a new camera from the ground up. instead of converting an old camera to a new purpose.
As the 1990s progressed all the camera companies and some computer companies were making and selling digital cameras. Nikon marked a milestone in 1999 with the D1. This was a camera that could deliver image quality just as good as 35 mm film and it accepted the autofocus Nikkor lenses. Newspaper photographers loved it! The demise of film cameras lurked on the horizon.
Canon broke the $1,000 barrier for a DSLR in 2003 with the introduction of the Digital Rebel in 2003. The general public had a feeding frenzy taking ownership of this 6.3 Megapixel DSLR as fast as the factory could turn them out. In the years since, the price for a DSLR has come down several notches with the features have increased. In 2010 Canon is selling the 10 Megapixel Rebel XS for $499 and this includes a zoom lens!
So now we have inexpensive DSLR cameras with an accurate viewfinder and interchangeable lenses. Life is good! The advantage of a DSLR over less expensive digital cameras is the ability to change lenses. Nikon, Canon, Olympus, Sony and the major manufacturers offer all sorts of telephoto, wide angle and macros lenses. Image stabilization systems help the photographer get sharper images than ever.
The disadvantage of a DSLR is that they cost more than fixed lens cameras. But as a person gets more involved in photography they usually trade up to better equipment so that there are less limitations to what they can shoot. The DSLR with roots in the film cameras of the past is a superior product. Professional photographers, serious amateurs and occasional shooters all the enjoy the benefits of the DSLR.
Monday, May 10, 2010
Depth of Field
When looking at the photos you may have noticed that sometimes an entire image is in sharp focus all the way from foreground to background, while other images are only in sharp focus for part of the image but the rest is blurry. The term Depth of Field refers to the part of the photo that is in focus.
An example of an image with a deep Depth of Field would be a landscape that shows flowers in the foreground, a lake with sailboats in the middle and mountains in the background with all parts of the scene in focus.
What determines Depth of Field and how can one control it? The aperture setting of the lens has a direct relationship to the Depth of Field in the photo. The aperture setting are labeled with f-stop numbers. A large number like f-16 is for a smaller opening. An f-stop with a small number like f-2 denotes a larger opening. At first it may be confusing that the small number is a large opening, but after a while you will get used to it.
When the lens is set to a large aperture such as f-2.0 or f-2.8 the Depth of Field in the photos is rather shallow. But when an aperture such as f-16 or f-22 is used the resulting image will have a deep area of Depth of Field. For a midway setting, f-8 is often chosen.
Understanding the f-stops or aperture settings on your camera is essential to mastering depth of field. After a person learns to master the camera settings, their photos will show an improvement.
If your camera is always set to the green rectangle for FULL AUTO or P for PROGRAM you will not be able to master Depth of Field. To set the aperture, place the dial on AV for APERTURE PRIORITY. (It is a good idea to read you camera manual to learn the specifics of you camera model.) After the dial is set to AV you have some freedom to choose an f-stop. The reason you have some freedom and not total freedom is because there is a relationship between aperture and shutter speed. When you use a small aperture such as f-22 there is less light entering the camera so the shutter speed must be reduced so that enough light enters and you get the proper exposure. In AV mode the camera’s onboard processors will calculate and set the shutter speed for you. In M or MANAUL mode you can set both aperture and shutter speed.
If we go the other way and set a wide aperture like f-4 then a lot of light is entering the camera so we need to compensate by increasing the shutter speed. Again the camera’s onboard processors will calculate and set the shutter speed for you.
Canon cameras also have a setting on the dial for Depth of Field mode. The setting on the dial is marked A-DEP which lets the photographer select on one spot in the foreground and one spot in the background then the camera assures that everything between the two is in focus.
The focal length of the lens and the camera-to-subject distance also affects Depth of Field but I will not get into that now.
So now you should take a few minutes to read your camera manual and then go grab your camera and experiment with different f-stops and see how the Depth of Field in the image changes. Don’t be afraid to make mistakes. Have fun and be creative.
Friday, April 16, 2010
Aperture and f-stops
On all but the simplest of cameras the aperture can be adjusted to open very wide or close down to a very small pinhole. Why do we want to open or close the aperture?
The reason is because some situations are very bright like a sunny beach at

One analogy for the aperture would be salt shaker. Instead of letting light enter a camera think of putting salt on your soup. Do you want a little bit of salt to come out of three little holes? Maybe you would prefer twenty large holes so you can have nice salty soup. That is how the aperture is. The lens has settings called f-stops that allow you to regulate the amount of light coming in. For some odd reason an f-stop with a large number like f16 is a smaller opening that an f-stop with a small number like f4.

As you gain an understanding of apertures and f-stops you will be able to create great photos in situations that previously would have been problem.
We can also control light with the shutter speed. This will be discussed in an upcoming blog post.
Wednesday, March 24, 2010
What is the ISO setting on my camera?
Have you ever asked, “What is this button for?” Many people use a camera without understanding the function of some of the buttons and dials. Is that you?
The topic today is ISO setting. What is ISO? The initials stand for International Organizational Standard, but that doesn’t answer the question of how to use the ISO setting on your camera. The reason camera manufacturers include this feature is to allow the photographer to adjust the camera’s sensitivity to light.
Back in the days before digital photography, a rating system was established so film could be labeled with a number. The precursor to the ISO was the
American Standards Association (ASA). For a bright sunny day a photographer would load 100 ASA film into the camera. If the setting was cloudy or shady then 400 ASA film was used. A disadvantage was that the entire roll (36 exposures) was at that ASA (ISO) setting. What if you shoot half a roll of 400 ASA and then it stops raining and the sun comes out? An advantage of digital photography is ability to change the ISO setting for every shot if you like.
Thirty years ago film was available at ASA 64, 100, 160, 200, 400 and 800. Later the chemists at Kodak and
Why would a person want to adjust the light sensitivity on a camera? Are there disadvantages? Why not just crank the dial to the highest setting like 3200 for instance? There is a trade off. With a low setting like 100 ISO the images are smooth and pleasing. At the high end of the spectrum, such as 1600 and 3200 an issue with digital noise becomes apparent. This is the fuzzy or buzzy texture seen especially in the shadow parts of an image.
In film the problem with a high ISO was grain the equivalent of noise.
A rule of thumb, (and photographers like to break rules at times) is to use the lowest ISO possible. But, sometimes the choice is no photo or a slightly noisy photo. So turn the ISO dial up a notch or two and shoot. Some of the Pulitzer-prize winning photographs were a bit lacking in technical quality, but captured a moment in history for the whole world to see. It is fun to experiment with all different settings and compare the results. We learn by doing.
With less expensive point and shoot digital cameras the ISO is set automatically. So there is nothing to worry about. Even with more sophisticated cameras, when shooting in auto mode the ISO is set automatically going lower when there is plenty of light and raising to higher settings as the light decreases.
If you have lot of money to spend you can buy a pro camera with a better chip which will provide very low noise even at the higher ends of the scale. Also you can get software such as noise ninja to remedy the effects of noise. But if possible, get it right as you shoot it and eliminate the need for a software solution.
As you learn more about your camera and more about light you will understand how to override the camera and get some photos that you may have missed in the past.
Monday, March 8, 2010
What is so special about black and white photography?
For me the appeal of a well done black and white image is the simplicity. The eye is allowed to concentrate on form and texture without the distraction of color and hue. Some people are amazed by the wide range of shades of gray that can be found lurking between darkest black and brightest white. It can be stunning. A couple years ago I was asked to photograph a house that had been the dwelling place of a
At the dawn of the history of photography there was no color process but people were impressed enough with the magical images produced on tin or glass plates even though they were monotone. In the sepia process instead of shades of gray, various shades of brown created the images.
As science progressed and color film gained in popularity some people began to perceive black and white photography as inferior or outdated. However, among the true art lovers, that perception did not take hold.
Even in the year 2010 when there all sorts of advanced photo techniques, some photographers still concentrate on black and white photography. Great photographers have always known that a photo does not have to dazzle the viewer with bright colors if the techniques of composition of lighting are properly applied. The landscape photos of Ansel Adams and the still life pepper plants of Edward Weston are proof enough.
The three images that I posted with this entry are some of the images that I created for my own enjoyment. Starting with just a simple item like a chain, a gear or a cluster of ferns, I was able to shoot a few frames with my camera and afterward refine the image into the stark and simple hues of gray which convey the essence of scene.